
Almost a year ago this April my husband and I bought what is in my mind the most perfect kitchen ever! As a couple that loves to cook and myself who is always trying a new recipe whether it is for a dinner or dessert, we spend a lot of time in the kitchen!
When Josh went to the county permit office and presented the woman with our floor plan since we are doing other renovations at the time the woman sat there for a moment looking at our house. She then looked him dead in the eye and said “Did you know you bought a house where you kitchen is 30% of your house.” Now that doesn’t sound like that much but in a relatively small house, it takes up a good chunk of that square footage!
In our previous apartments, most of them had a bar or L shaped counter that was perfect for extra working space or entertaining guests. So after living, cooking, and evening dancing in our large kitchen we decided we wanted a kitchen chart. So this is how we did it.
I started off the process for mocking up the design based on measurements we took of the kitchen. We made sure that with the oven door open and the fridge door open we still had room to at least shimmy past the kitchen cart. During this time is when we also agreed it needed wheels, which has been handy when entertaining and cleaning.

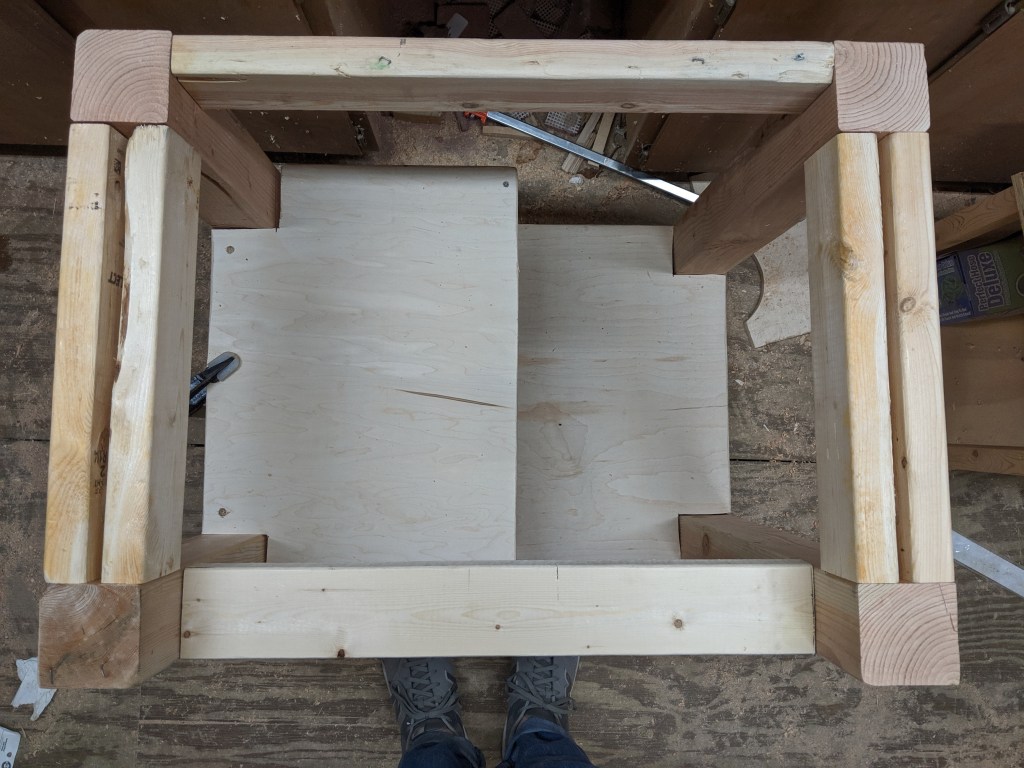
So here is my mock up. Based on our measurements of the space available and the overall size of the top I went from there. I am not one to pick up a saw unless in a pinch so I wanted these instructions to be foolproof for Josh when I handed them over. in the image above you can see that we started with a 40 inch by 24 inch maple wood butcher block top that Josh made prior to the construction. (That will be a future post) From there I wanted a drawer and and open bottom, but we don’t always get what we want. He gave me more! When you see the finished version, you will notice shelves that were added underneath.
SO to lay it out plain and simple my design template goes:
- Counter top
- Counter trim/support with gap for drawer placement
- posts to support the whole cart
- drawers measurements
- drawer slider measurements
After this was said and done I sent him off to the store and waited for the construction to begin! Josh went to the store and purchased: pine 4 by 4’s for the columns, 2 by 4 are common studs, and the shelves are plywood.
Assembling the frame he used 3 inch wood screws with pocket holes.
The shelves and bottom are attached with 3/4 inch wood screws.
The top is attached with L brackets and 1.5 inch wood screws.
Any holes that were visible to the eye were then covered with wood putty.

All done and ready for me to make it look fabulous! To match our kitchen we went with a matching high shine, water, stain resistant white paint. We also got a matching drawer handle to our cabinets.
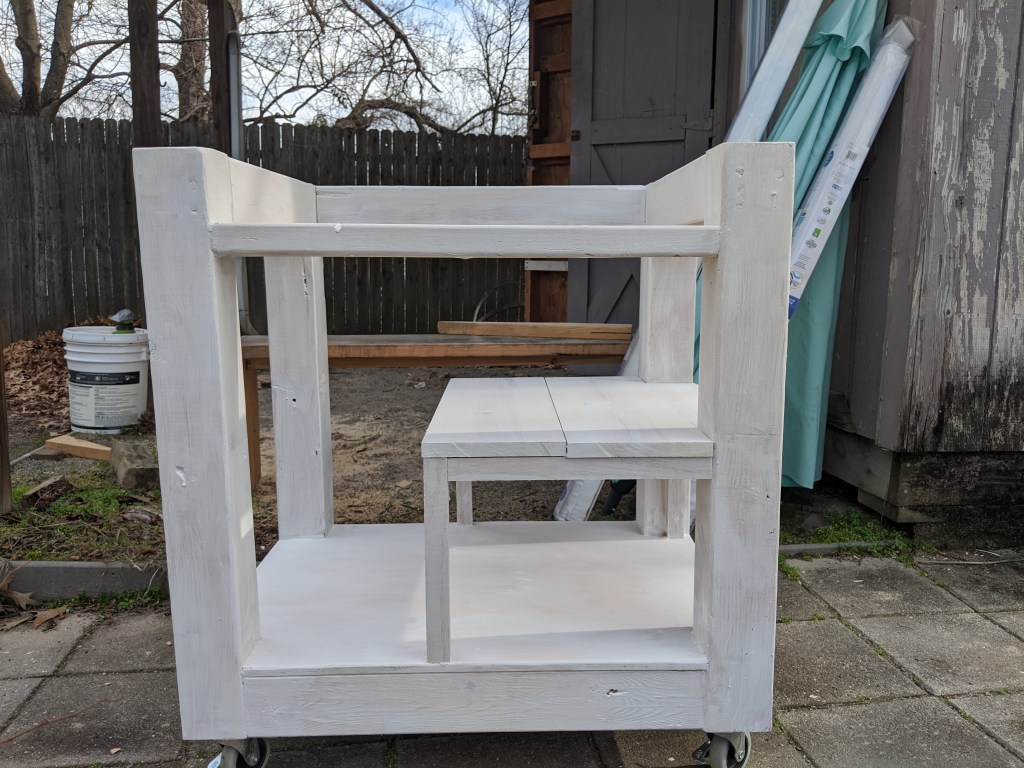
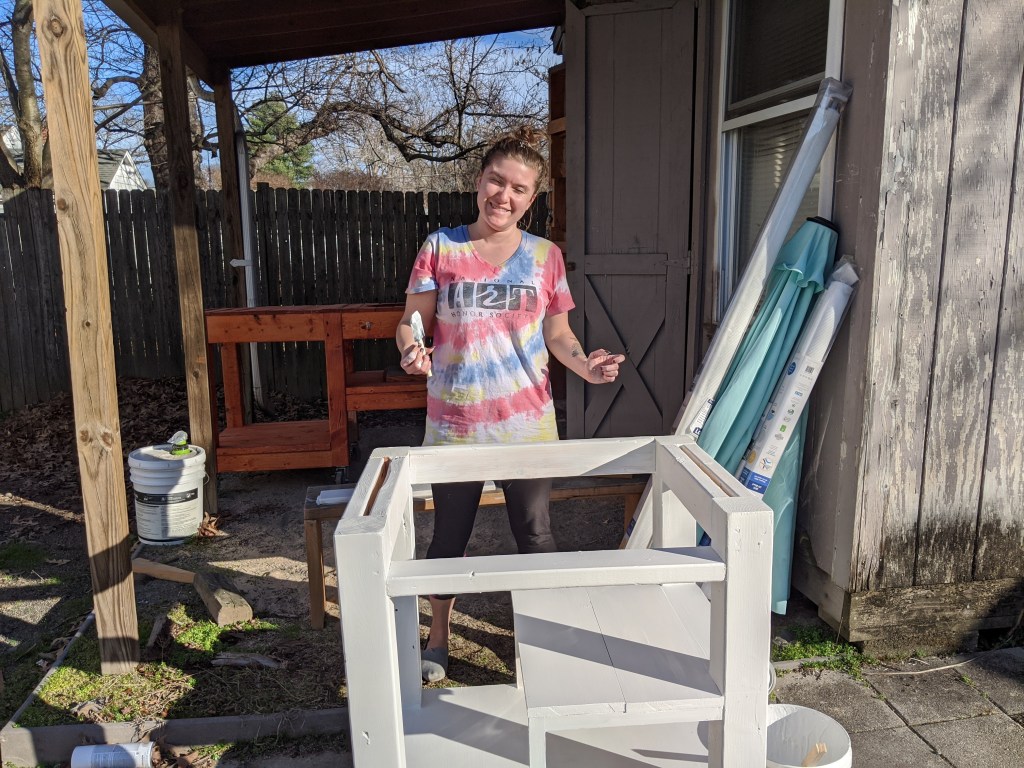
It VERY much need two if not three coats of white paint to give it that clean polished look. Here you can see the multi tiered shelves he added to the bottom to add more storage. Josh, my loving husband, took my picture while I was painting. It wouldn’t be a “husband took my picture” photo if I wasn’t squinting from the sun, at a bad angle, or remotely looking like I am actually working!
Here you can see the storage really being put to use which has been turned into a space for dry ingredients, fruit, and one large pot that doesn’t really fit into any other cabinet.

Plus I can’t resist! A cute picture of one of our cats, Fitz trying to use the Kitchen cart as his personal playground. Thanks for reading our rambles and if you like what you see come back for my DIY home improvements because we can’t leave our home alone! If you have any questions about this project send us and email and we will try and answer your questions the best we can!

